Industrial Component Quality Control Checklist: A 2026 Guide

Why Your Quality Control Checklist Matters for Spare Parts Sourcing
A machine stops. Your production line halts. You need a replacement servo drive or PLC module, fast. The part arrives from a distributor you've never worked with before. You have minutes to decide: accept it or reject it.
Most procurement teams skip this step. They assume the supplier has already vetted the part. They don't. OEMs ship overstock. Brokers liquidate surplus inventory without detailed testing. Refurbished components arrive with minimal documentation.
Teams with a structured quality control checklist can reduce acceptance delays and catch defects before they reach the assembly line. Teams without one may spend more time troubleshooting field failures that an inspection could have prevented.
Define Your Industrial Component Inspection Criteria
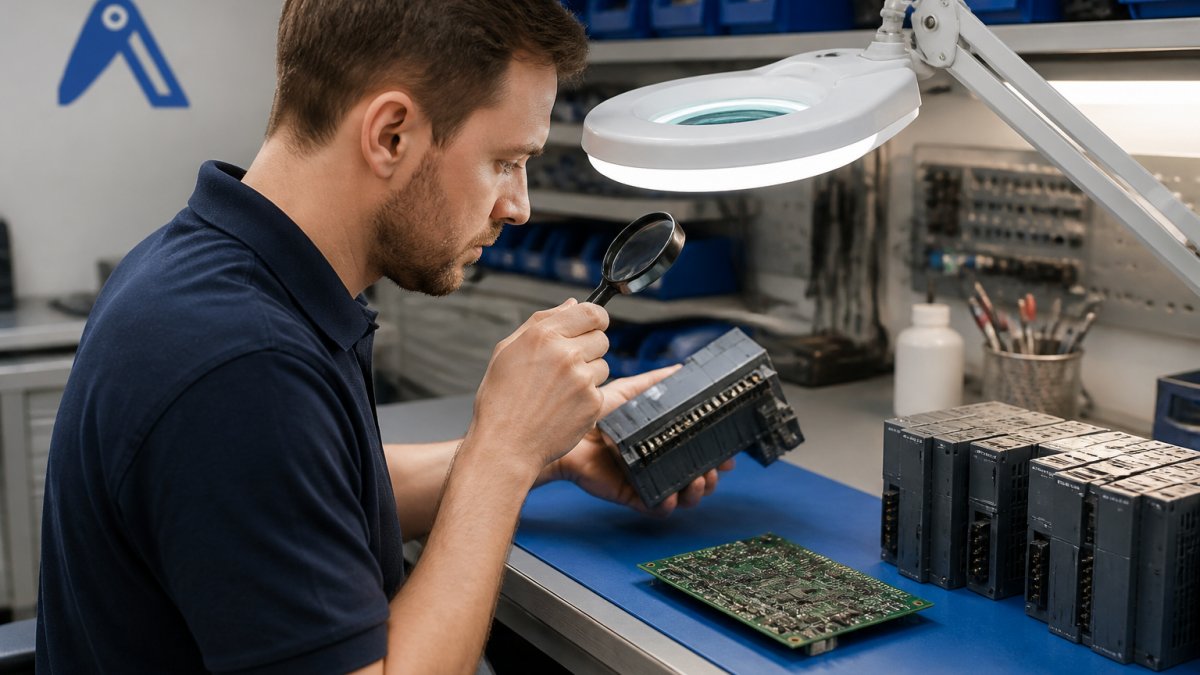
Your inspection criteria define what "acceptable" means for your supply chain. Without clear criteria, inspectors make inconsistent decisions. One person rejects a connector with minor oxidation. Another accepts identical corrosion on a different part. Consistency matters.
Start by separating visual and mechanical inspection points from electrical and functional testing. Visual checks happen first, they're fast and eliminate obvious damage. Electrical testing comes second and requires equipment. This sequence saves time and prevents wasted effort on parts that are already compromised.
Visual and Mechanical Inspection Points
Check for physical damage first. Look at the housing, connectors, and mounting surfaces. Corrosion on pins or terminals indicates environmental exposure. Deep scratches or dents on the housing suggest rough handling. Bent connector pins are a hard reject, they won't seat properly in a socket.
Document what you see. Take photos if the part will be stored or shipped internally. Note the specific location of any damage. This creates a record and prevents disputes later if the part fails in the field.
For refurbished components, check for signs of improper cleaning. Residual flux, solder splatter, or cleaning solution residue indicates rushed work. Legitimate refurbishment includes proper cleaning and inspection documentation.
Electrical and Functional Testing
Electrical testing requires equipment: a multimeter for continuity checks, a power supply for functional verification, and ideally an oscilloscope for signal integrity on high-speed interfaces. Not every part needs full electrical testing, a surplus PLC module may only need power-on verification. A servo drive might need encoder feedback testing.
Define testing depth by component type. For critical components in safety circuits, test thoroughly. For non-critical spares, a power-on check may suffice. Document which tests apply to which parts.
Test in a controlled environment. Use an isolated power supply with current limiting. Many field failures happen because a part was tested with incorrect voltage or polarity. Set up a testing station with proper labeling and grounding.
How to Verify Industrial Spare Part Condition Before Acceptance
Verification happens before you accept ownership. Once a part enters your inventory, it's yours, including the cost of any failures. The acceptance decision is irreversible, so get it right.
Verification includes three layers: physical inspection, electrical testing, and documentation review. All three must pass. Missing documentation alone should trigger rejection, even if the part tests fine.
Documentation and Traceability Requirements
Every part needs documentation. For OEM stock, this is straightforward, the OEM provides a serial number, date code, and test certificate. For surplus or refurbished parts, documentation is sparse. This is where most teams fail.
Require a bill of materials (BOM) reference or part number from the supplier. Cross-reference it against your internal systems. If the supplier can't provide a part number, ask for a photo of the nameplate. Automa.Net's AutomaSnap feature can identify parts from photos when nameplates are unclear or partially worn.
Ask for test reports if the part was refurbished. Legitimate refurbishers provide calibration certificates for test equipment and records of what was tested. If the supplier says "tested and working" with no documentation, that's a red flag.
Handling Refurbished and Surplus Components
Refurbished parts are legitimate. They've been cleaned, tested, and often come with a warranty. But "refurbished" means different things to different suppliers. Some perform full diagnostics. Others do minimal testing.
Surplus parts are typically new but old stock, purchased years ago and never used. They carry the same risk as new parts: they may have been stored improperly, exposed to humidity, or damaged in transit. Age alone doesn't make a part bad, but it does require verification.
For both categories, require the supplier to specify what testing was performed. Continuity only? Power-on only? Full functional testing? Partial testing means higher risk on your end.
Legacy Hardware Authentication Checklist
Obsolete components attract counterfeiters. A fake Siemens S7-300 PLC may look identical to the real thing. It can fail, causing issues once installed in your machine.
Authentication starts with the nameplate. Real components have consistent markings, proper date codes, and serial numbers that follow manufacturer conventions. Counterfeits often have smudged printing, misaligned logos, or serial numbers that don't match manufacturer numbering schemes.
Nameplate Verification and Serial Number Validation
Examine the nameplate under magnification. Real nameplates are printed with consistent ink density and alignment. Counterfeit nameplates often show printing defects: uneven ink, misaligned text, or faded areas that suggest poor-quality printing.
Check the date code format. Siemens uses a specific format (e.g., "2019-W43" for week 43 of 2019). Allen-Bradley uses a different format. If the date code doesn't match the manufacturer's convention, it's suspicious.
Verify the serial number against the manufacturer's database if available. Some OEMs provide online verification tools. If the serial number doesn't exist in their system, the part is either counterfeit or has been heavily refurbished (which requires different handling).
Detecting Counterfeits and Rebranded Components
Rebranded components are parts pulled from one device and relabeled as something else. A power supply from a discontinued industrial printer gets a new label and is sold as a standalone component. It may work, but it has no warranty and no support.
Check for signs of label replacement. Look for glue residue, mismatched label colors, or labels that sit slightly proud of the surface. Use a magnifying glass. Counterfeiters often use low-quality labels that don't conform to the housing properly.
Weigh the part if you have a reference weight. A counterfeit component may be slightly lighter or heavier due to different internal construction. This is a secondary check, not definitive, but it's quick and free.
Find it on Automa.Net →
Build Your Pre-Inspection Workflow and Acceptance Standards
A workflow keeps inspections consistent. Without one, each team member makes their own decisions. Consistency is what separates a reliable supply chain from a chaotic one.
Your workflow should have three checkpoints: intake (receiving and initial visual inspection), testing (electrical and functional verification), and acceptance (documentation review and final approval). Each checkpoint requires a sign-off. This creates accountability and an audit trail.
Setting Pass/Fail Criteria for Your Supply Chain
Define pass/fail criteria before you start inspecting. Vague criteria like "looks good" don't work. Specific criteria do.
Example for a servo drive:
- Connectors: No bent pins, no visible corrosion beyond light surface oxidation
- Housing: No deep dents or cracks
- Power-on: Drive powers up, no error codes on startup
- Encoder feedback: Signal stable within ±2% of baseline
- Documentation: Part number, serial number, and at least one test report present
Example for a PLC module:
- Connectors: All pins present and straight
- Housing: No cracks or heavy damage
- Power-on: LEDs light as expected, no burnt smell
- Memory: Backup battery voltage above 2.8V (if applicable)
- Documentation: Serial number and date code readable, manufacturer verification passed
Write these criteria in a table or checklist. Share it with your inspection team. Update it based on field failures, if a part passes your checklist but fails in the machine, your criteria were too loose.
Creating an Audit Trail and Quality Documentation System
Every inspection decision needs a record. Document the inspector's name, date, findings, and decision (accept/reject). If you reject a part, document why. This creates accountability and helps you identify patterns.
Use a simple spreadsheet or a more structured system. The format matters less than consistency. Include these fields:
- Part number and serial number
- Supplier name
- Inspection date and inspector
- Visual inspection result (pass/fail)
- Electrical testing result (pass/fail)
- Documentation review result (pass/fail)
- Overall decision (accept/reject)
- Notes (specific defects or concerns)
Keep records. If a part fails in the field, you'll need to trace it back to the inspection record and determine what went wrong.
Common Defects and Non-Conformance Handling
Defects fall into categories. Some are deal-breakers. Others are acceptable depending on the application.
Bent connector pins are always a reject. They won't seat properly and will cause intermittent contact failures. Corrosion is context-dependent. Light surface oxidation on a connector that will be used indoors is acceptable. Heavy corrosion on a connector in a harsh environment is not.
Document defects by type: mechanical damage, corrosion, electrical failure, missing documentation, counterfeit indicators. This helps you identify patterns. If 30% of parts from one supplier show corrosion, you have a supplier problem.
Non-conformance means the part doesn't meet your acceptance criteria. When you receive a non-conforming part, you have three options: return it, rework it, or accept it with documented risk. Most teams choose return.
Integrating Your Checklist into Real Sourcing Workflows
A checklist on paper is useless if it's not actually used.
When you place an order, include your quality control requirements in the purchase order.
When the part arrives, route it to inspection before it enters inventory.
Use Automa.Net's Request Board feature to broadcast your part requirements to verified suppliers. Include your quality control criteria in the RFQ.
For complex BOMs, use BOM List Cleaner to standardize part numbers before sourcing.
Keep your checklist digital if possible. A shared spreadsheet or a dedicated QC system lets your team access it from anywhere.
Your quality control checklist is the difference between a machine that runs reliably and one that fails unpredictably.
When you're sourcing hard-to-find or legacy components, verification becomes even more critical.
Frequently Asked Questions
What are the critical inspection points for refurbished industrial automation components?
Focus on connector cleanliness, solder joints, capacitor condition, and firmware version compatibility. For servo motors and drives, check bearing play, insulation resistance, and thermal paste condition. Test power-on functionality and parameter retention. Refurbished parts should have a documented test report showing load testing results and any repairs performed. Request the original OEM serial number and manufacturing date to verify authenticity.
How do you verify the authenticity of legacy PLC and HMI modules?
Cross-reference the nameplate serial number against the OEM's records if available. Check for consistent font, logo quality, and label adhesion on genuine parts. Verify internal component brands match the claimed manufacturer—counterfeit PLCs often use generic or mismatched chips. Use AutomaSnap to photograph the nameplate and cross-check against known specifications. Request the distributor's source documentation and chain of custody for the part.
What documentation should accompany a high-quality industrial spare part?
Require a test certificate or functional report, original part number and serial number, manufacturing date, storage conditions history, and any repair or refurbishment records. For obsolete components, a statement of origin (OEM overstock, machine decommissioning, or authorized distributor inventory) is essential. Include photographs of the part and connectors. This documentation protects you from counterfeit risk and proves compliance if audited.
How does DIN EN ISO 9001 apply to my quality control checklist?
DIN EN ISO 9001 requires documented inspection procedures, defined acceptance criteria, and traceability records. Your quality control checklist must align with your documented quality management system. Include inspection frequency, responsibility assignments, and non-conformance procedures. Keep records for the retention period your system defines. This standard applies whether you're inspecting incoming parts, refurbished stock, or surplus inventory destined for resale.
What are the most common failure points in surplus servo motors and drives?
Bearing wear, capacitor degradation, and thermal cycling damage appear frequently in aged surplus stock. Servo motors fail on insulation breakdown after prolonged storage without climate control. Drives show firmware corruption or parameter loss if powered down improperly. Always load-test drives at 50% rated current for at least 4 hours and measure insulation resistance on motors before accepting surplus stock. Request storage condition records from the seller.
How can I reduce sourcing delays when I need an obsolete component urgently?
Use AutomaSEARCH to scan verified distributor inventory across Europe simultaneously rather than contacting suppliers individually. Post an RFQ on the Request Board to reach 5,000+ suppliers at once. Include the exact part number, OEM name, and any acceptable alternatives. For legacy hardware, AutomaSnap can identify unmarked or partially damaged components from a nameplate photo, expanding your sourcing options when documentation is incomplete.
Find it on Automa.Net →
Other Posts

Siemens S5 vs S7 Compatibility: The 2026 Migration Guide
S5 vs S7 compatibility explained: module mapping, program conversion limits, communication gateways and replacement options for legacy Siemens PLCs.
Read More →
Minimize Downtime vs Simplify Procurement: Inventory Guide
Compare minimize downtime vs simplify procurement for inventory management. Learn which approach protects uptime and when to use each.
Read More →
How to Source Obsolete Industrial Parts: 2026 Guide
Learn how to source obsolete industrial parts: confirm lifecycle status, verify suppliers, and find discontinued PLCs, drives and HMIs fast.
Read More →